20 Best Image Optimization Plugins For WordPress Sites
Why Your WordPress Site Desperately Needs Image Optimization
Your website’s images can either make it shine or slow it to a crawl. Over the years, I’ve optimized hundreds of WordPress sites, from small blogs to heavy eCommerce stores, and I’ve seen one recurring issue: massive, unoptimized images eating up bandwidth and ruining Core Web Vitals.
Optimizing images is one of the simplest yet most powerful ways to speed up your WordPress site, boost SEO, and improve user experience. But not all optimization plugins are created equal. Some handle compression locally, others offload to the cloud. Some focus on automation, others on granular control.
Key Takeaways
- Image optimization directly impacts page load speed, Core Web Vitals, and SEO rankings.
- The best plugins combine compression, lazy loading, and modern formats like WebP or AVIF.
- Always test settings because over-compression can hurt image quality and conversions.
- Cloud-based optimizers are faster and save server resources, while local compressors offer more control.
- Regularly audit your media library to keep performance consistent over time.
1. EWWW Image Optimizer
EWWW Image Optimizer has been around since 2013, and there's a reason it remains strong, with over a million active installations. What makes EWWW stand out is its flexibility. You can optimize images directly on your server using your own resources, or you can use their cloud-based compression API if you want more power.
The plugin automatically compresses new uploads and gives you a bulk optimizer for existing images. It handles JPG, PNG, GIF, PDF, and even converts to WebP format. That WebP conversion alone can reduce your image sizes by 25-30% compared to JPEG. One feature I really appreciate is the background optimization. Unlike some plugins that require you to keep the browser tab open, EWWW works quietly in the background.
The free version is genuinely usable with unlimited image optimization and no file size restrictions. The premium version starts at just $7 monthly and includes Easy IO CDN, which automatically serves optimized images to your visitors. I've found EWWW works especially well for photographers and portfolio sites where image quality matters.
2. ShortPixel Image Optimizer - The Quality-Focused Powerhouse
ShortPixel Image Optimizer for WordPress - 2024 Installation Guide
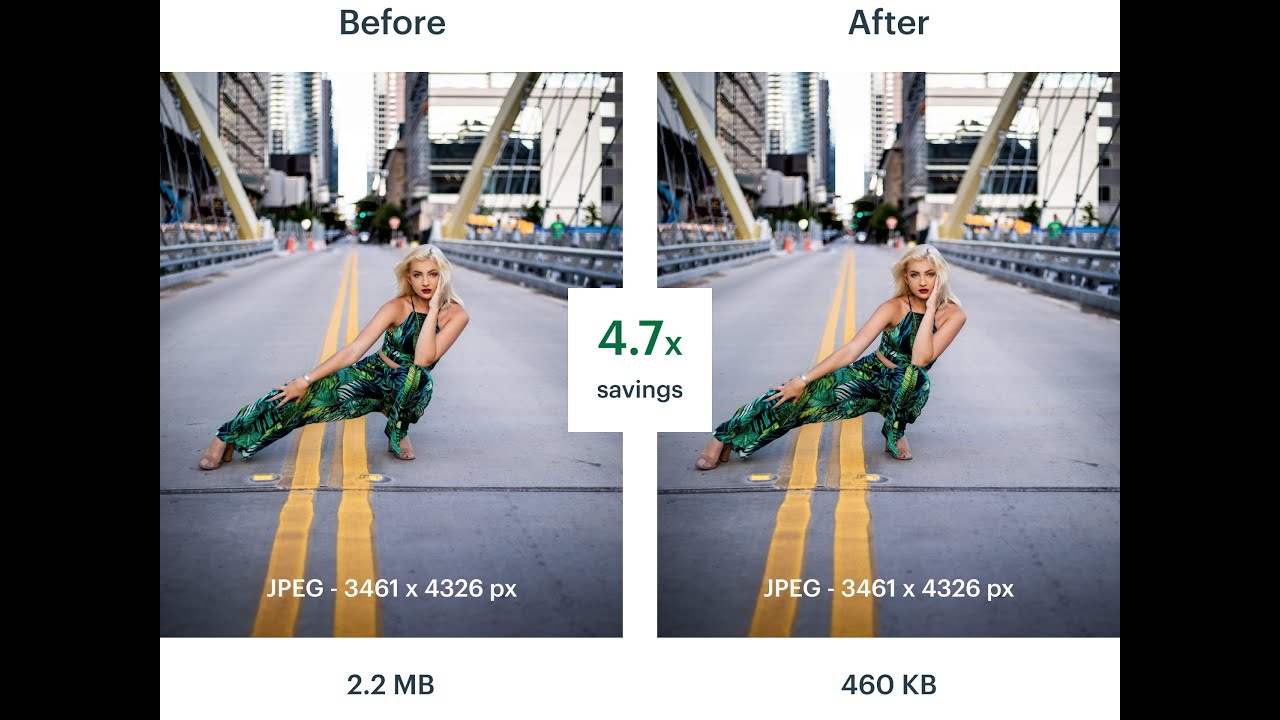
ShortPixel is my go-to when I need maximum control over compression quality. What sets it apart is the three-tier compression system: lossy, glossy, and lossless. Most plugins only offer lossy and lossless, but that glossy middle ground is perfect for situations where you need better compression than lossless but don't want the artifacts that can come with aggressive lossy compression.
I tested ShortPixel extensively last year on a travel blog with over 5,000 images. The glossy compression mode reduced file sizes by an average of 54.8% on JPEGs while maintaining beautiful visual quality. The plugin automatically converts images to WebP and AVIF formats. AVIF is newer than WebP and offers about 50% better compression while maintaining better quality.
Key Features Include:
- 100 free credits per month for smaller blogs
- One-time credit packages starting at $9.99 for 10,000 credits
- Monthly subscription at $3.99 for 7,000 images
- Smart thumbnail optimization and Retina image handling
- Ability to restore original images anytime
3. Imagify - The User-Friendly Speed Demon
If you want something that just works without needing a PhD in image compression, Imagify is your answer. Developed by WP Media (the same team behind WP Rocket), this plugin prioritizes simplicity without sacrificing power. Imagify offers three compression levels: Normal, Aggressive, and Ultra.
One feature I love is the bulk optimization interface. It's clean, straightforward, and shows you exactly what's happening. You can see compression percentages in real-time, and the whole process happens in the background without tying up your browser. The WebP and AVIF conversion is seamless with automatic browser detection and fallback support.
With over 900,000 active installations and a 4.3-star rating, Imagify has proven itself reliable. The free plan gives you 25 MB of optimization per month. Paid plans start at $4.99 monthly for 1 GB. I've found Imagify particularly good for business sites and online stores where you want professional results without spending hours tweaking settings.
4. Smush Pro - The Feature-Rich Giant
Smush Pro - Image Optimization for WordPress
Smush has the numbers to back up its claims with over 1 million active installations and a 4.8-star rating on WordPress.org. Created by WPMU DEV, it's backed by a major WordPress company with serious resources. The free version offers unlimited image optimization with basic lossy compression, which is genuinely impressive because most competitors cap you at 100-500 images monthly.
Where Smush Pro really shines is in the premium features. The CDN integration automatically resizes images based on the visitor's device, so mobile users get appropriately sized images instead of massive desktop versions. The lazy loading implementation is solid, directly improving your Largest Contentful Paint score.
Premium Features Include:
- CDN delivery from 119 locations globally
- WebP and AVIF conversion
- Automatic image resizing for PageSpeed compliance
- Optimization for images outside the media library
- Starts at $6 monthly with multi-site support
5. Optimole - The Real-Time Optimization Marvel
Wordpress Image Optimisation Plugin - Optimole - WebP and AVIF - Use for Free - Wordpress Tutorial
Optimole takes a completely different approach than traditional plugins. Instead of compressing images once and storing them on your server, Optimole processes images in real-time based on each visitor's device, browser, and connection speed. When someone visits your site, Optimole analyzes their device dimensions, screen resolution, and connection quality, then serves a perfectly optimized version.
This adaptive approach achieved the highest compression rates in my testing, up to 58.1% reduction on JPEGs and even more dramatic results on PNGs. The CDN delivery from 450+ global locations means your images load fast regardless of where your visitors are located. Everything is offloaded to Optimole's cloud, so your server isn't doing any of the heavy lifting.
The free plan supports up to 2,000 monthly visitors and 1 GB bandwidth. Paid plans start at $19.08 annually for 10,000 visitors. I've seen Optimole work particularly well for photography websites, magazines, and content-heavy blogs where image quality and loading speed are both critical.
6. TinyPNG - The Specialized Compression Expert
Compressing Images with TinyPNG
TinyPNG has been optimizing PNG and JPEG images since way before WordPress plugins were even a thing. The WordPress plugin connects to TinyPNG's compression service, which uses advanced techniques to selectively reduce colors in PNG images and optimize JPEG compression. What makes it special is how it handles transparency while maintaining that subtle alpha channel information.
The plugin automatically optimizes images as you upload them. For existing images, there's a bulk compression option that works efficiently. You get 500 free compressions per month with the API key. After that, pricing is straightforward at $25 for 2,500 compressions, with monthly plans starting at $50 for 10,000 compressions.
One limitation is that TinyPNG focuses specifically on PNG and JPEG compression without next-gen formats like WebP or AVIF, and it doesn't include CDN delivery. I typically recommend TinyPNG for sites with lots of graphics, logos, and images that use transparency, where the algorithm excels at maintaining sharp edges.
7. Optimum Image Optimizer - The Premium Minimalist
Optimus takes a refreshingly simple approach in a crowded field of feature-bloated plugins. It does one thing: compresses JPG and PNG images, and does it exceptionally well without trying to be an all-in-one solution. The compression is handled on external servers, so it doesn't slow down your site or consume hosting resources.
Optimus offers both lossy and lossless compression options. The lossy mode typically achieves 50-70% file size reduction on JPEGs while maintaining good visual quality. WebP conversion is included, automatically creating next-gen versions of your images with proper browser detection.
The free version has a significant limitation as it won't optimize images over 100 KB. The premium version removes this limit for about $30 annually. For agencies, there's a multi-site license for around $150 for unlimited client sites. I find Optimus works best for bloggers and small business sites that want straightforward compression.
8. WP Compress - The Comprehensive Performance Solution
WP Compress goes beyond simple image optimization to address overall site performance. It optimizes images, minifies CSS and JavaScript, and includes real-time optimization capabilities that adapt content for each visitor. The real-time optimization engine works similarly to Optimole, analyzing each visitor's device and connection to serve appropriately optimized images.
WP Compress includes a global CDN that distributes your images across multiple edge locations. The plugin can operate in two modes: local optimization or real-time cloud optimization. The management portal is excellent for viewing all your connected sites in one dashboard, monitoring optimization statistics, and managing quotas across different projects.
Pricing is credit-based, with packages starting around $5 monthly for 5,000 image credits. Higher tiers include more credits and visitors. WP Compress particularly excels for larger sites, online stores, and professional blogs where you need comprehensive performance optimization beyond just image compression.
9. Regenerate Thumbnails Advanced - The Size Management Tool

While not strictly an optimization plugin, Regenerate Thumbnails Advanced solves a critical problem that impacts image performance: outdated or incorrect thumbnail sizes. Every time you upload an image to WordPress, the system automatically generates several thumbnail sizes based on your theme and plugin requirements. When you switch themes or update plugins, those thumbnail requirements change.
Regenerate Thumbnails Advanced scans your media library and creates any missing thumbnail sizes. More importantly, it can delete old, unused thumbnails that are just wasting server space. I've seen this free up several gigabytes on larger sites. The plugin works in the background and can handle tens of thousands of images without timing out.
When combined with an optimization plugin like EWWW or ShortPixel, regenerating thumbnails ensures you're serving properly sized images throughout your site. I recommend running this after switching themes, updating major plugins, or if you're seeing image quality issues or wrong sizes appearing on your site.
10. Imsanity - The Upload Size Enforcer
WordPress Plugins: Imsanity
Imsanity takes a preventative approach to image bloat. Instead of compressing images after upload, it automatically scales down massive images to reasonable dimensions during the upload process. You set maximum width and height values, and any image uploaded that exceeds those dimensions gets automatically resized before being saved to your media library.
This is incredibly useful when you're working with clients or team members who don't understand image optimization. They can upload their 8000x6000px photos straight from their camera, and Imsanity will scale them to sensible web dimensions automatically. The plugin can also bulk-resize existing images in your library.
Imsanity is completely free and works perfectly alongside compression plugins. Use it to handle dimensions while plugins like ShortPixel or EWWW handle compression. I particularly recommend Imsanity for membership sites, content platforms with multiple authors, or any situation where you can't control what gets uploaded.
11. WebP Converter For Media - The Format Specialist
WebP converter for WordPress Tutorial | Image Optimisation by Quicq
With browser support for WebP now exceeding 95% and AVIF support rapidly growing, converting your images to these modern formats should be a priority. WebP Converter for Media specializes in this conversion process, scanning your uploads directory and converting all JPG, PNG, and GIF images to WebP format.
What makes this plugin smart is its automatic fallback system. When a visitor's browser requests an image, the plugin checks if it supports AVIF. If yes, it serves the AVIF version. If not, it checks for WebP support. If neither is supported, it falls back to the original format. The converted images are stored in a separate directory, so your originals remain untouched.
One major advantage is that WebP Converter works with images throughout your entire WordPress installation, not just uploads. The free version handles WebP conversion for most users. The premium version adds AVIF support at around €29 annually. I've found this particularly useful on content-heavy sites where you want that extra 25-30% reduction that modern formats provide.
12. A3 Lazy Load - The Specialized Lazy Loading Solution
A3 Lazy Load Tutorial 2020 - How To Setup A3 Lazy Load Plugin For WordPress - A3 Lazy Load
Lazy loading defers the loading of images until they're actually needed. a3 Lazy Load focuses exclusively on implementing intelligent lazy loading for images, iframes, and videos. The plugin is lightweight and doesn't try to do image compression or format conversion; it just handles lazy loading exceptionally well.
What sets a3 apart is the granular control. You can exclude specific images or entire sections from lazy loading, which is critical because you don't want to lazy load your header logo or above-the-fold content. The lazy load effect is smooth and doesn't cause that jarring pop-in effect some lazy loading solutions create.
The plugin is free and actively maintained, working with virtually every theme and plugin without conflicts. I recommend a3 Lazy Load for sites that already have image compression covered but need to optimize their initial page load time, particularly for long-form content and image galleries.
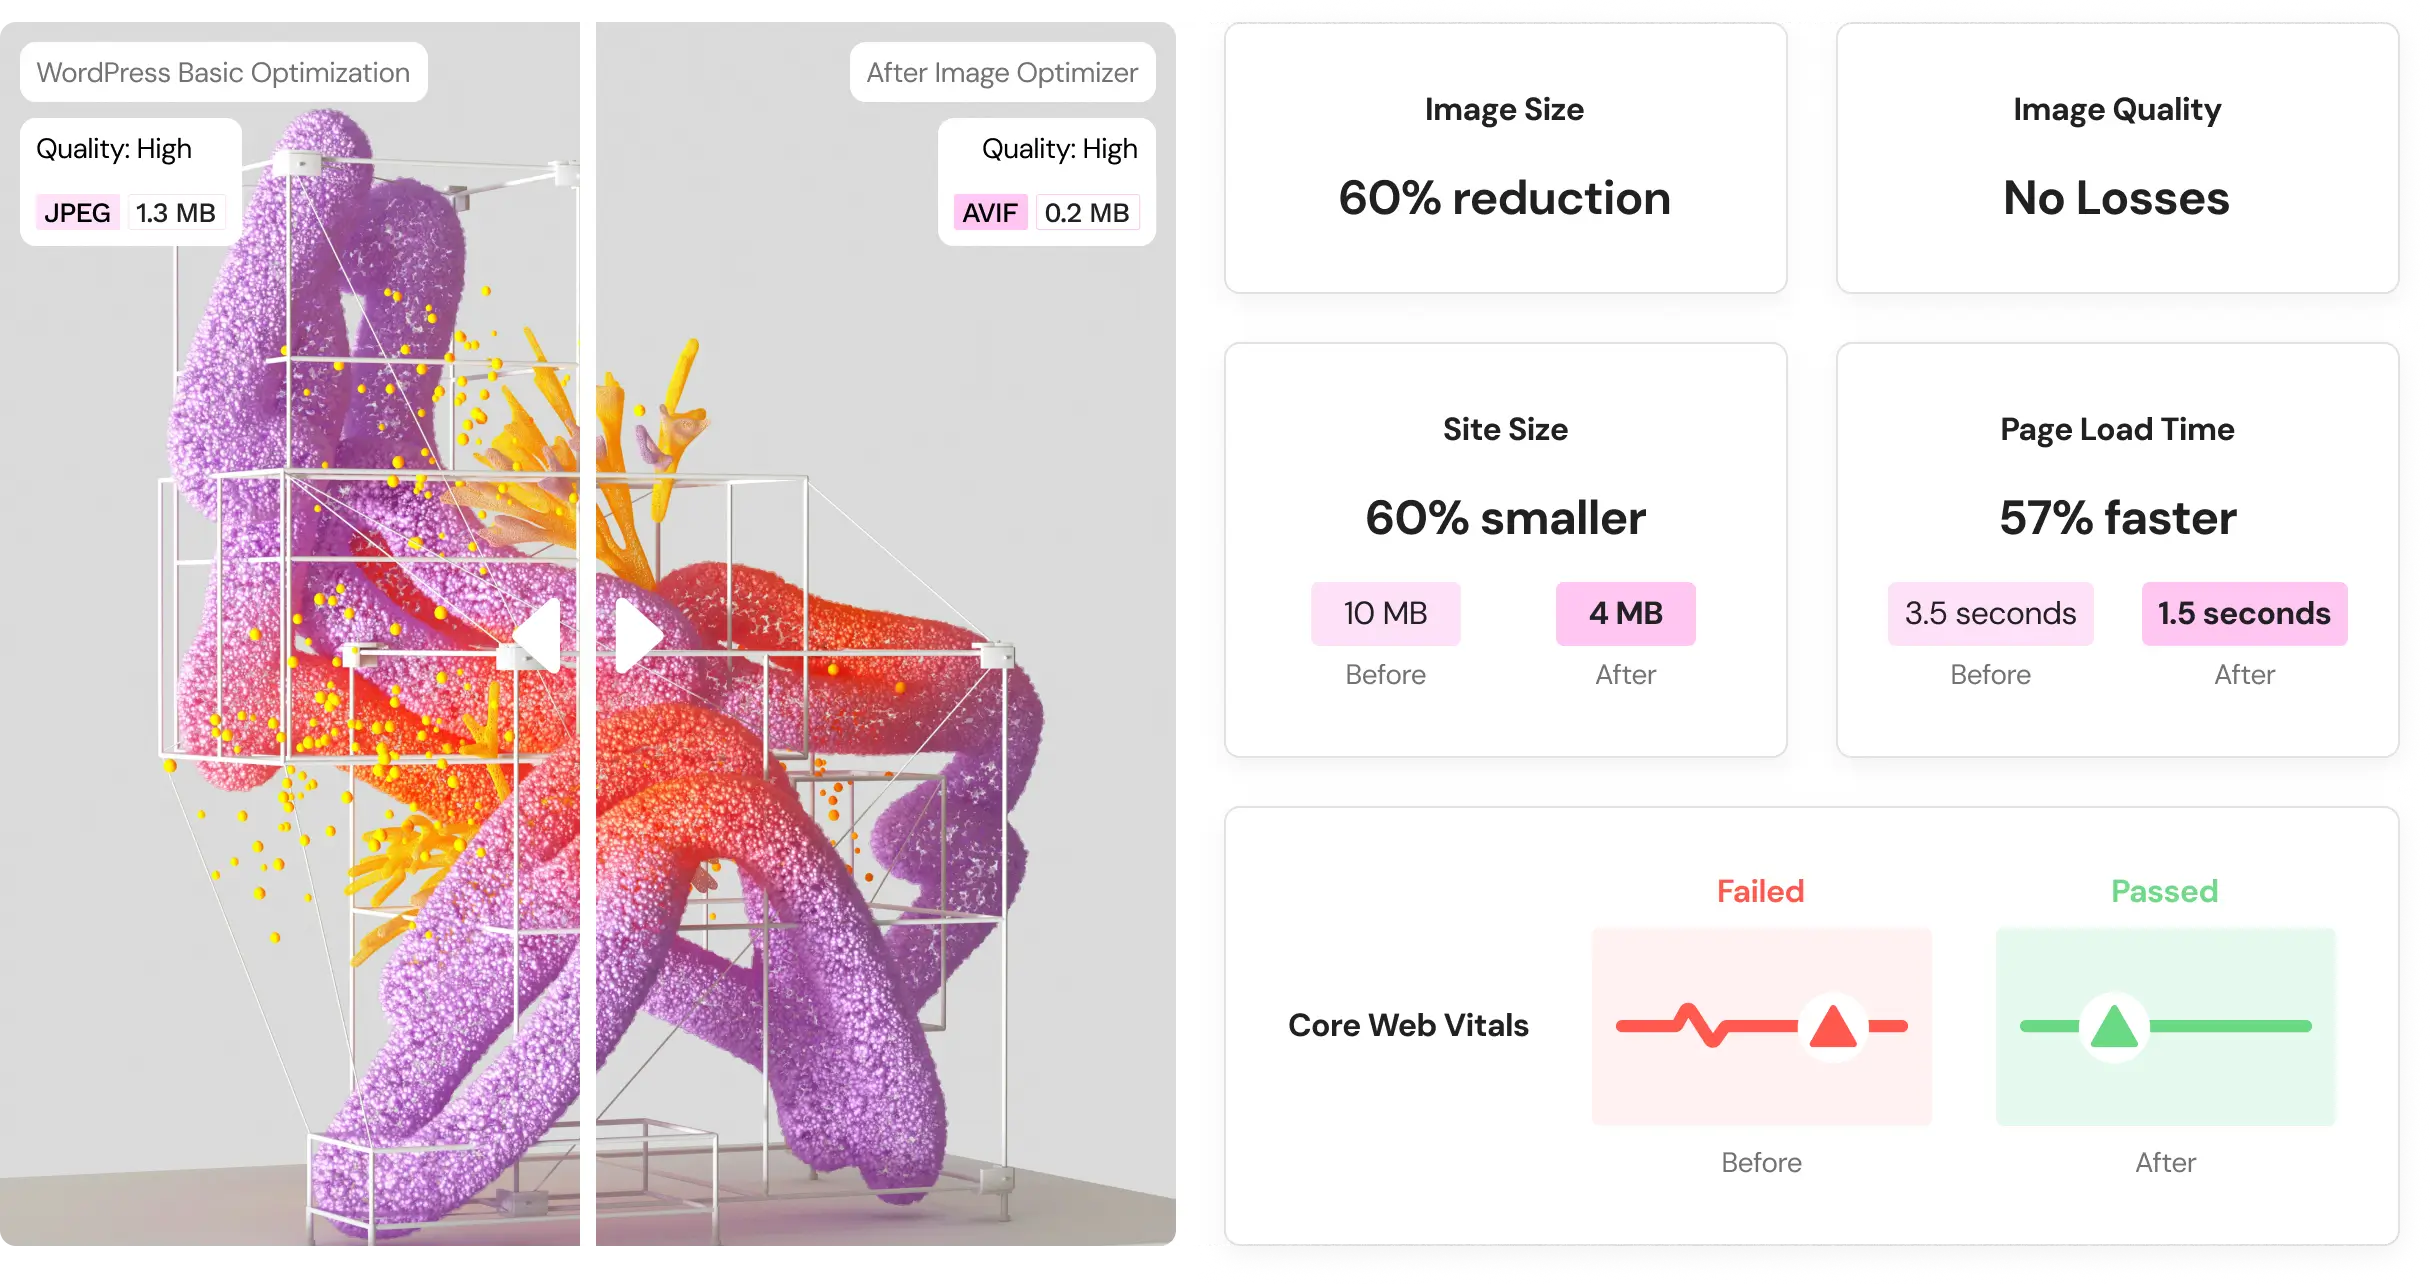
13. Image Optimizer By Elementor - The Page Builder's Choice
If you're building sites with Elementor, this plugin integrates seamlessly with your workflow. Image Optimizer by Elementor was developed by the same team behind the popular page builder, so the integration is tight and intuitive. The plugin handles compression, resizing, and WebP/AVIF conversion all in one package.
What makes it special is how it works within the Elementor interface. You can see optimization status and trigger bulk optimization without leaving the page builder. Background optimization is a standout feature, processing images automatically while you continue working on your site design.
Image Optimizer requires an Elementor account to use. The free plan includes up to 50 image optimizations per month. Paid plans start at $9.99 monthly for 1,500 images. Everything processes through Elementor's cloud infrastructure, which prevents timeout issues on shared hosting.
14. WP-Optimize - The All-in-One Performance Plugin

WP-Optimize takes a comprehensive approach to WordPress performance. While it includes image optimization capabilities, the plugin also handles database cleaning, caching, and minification of CSS and JavaScript files. The image optimization functionality uses the reSmush.it engine for solid compression.
What's convenient about WP-Optimize is having multiple optimization tools in a single plugin. The caching implementation is particularly good, generating static HTML files of your pages and dramatically reducing server load. Combined with image optimization, this one-two punch can significantly boost your site speed.
The premium version starts at $49 annually for single-site use and includes advanced features like minification and database optimization scheduling. For agencies, there's a multi-site plan at $99 annually. I recommend WP-Optimize for users who want a single solution for multiple performance issues.
15. NitroPack - The Performance Obsessive's Dream
NitroPack is the most comprehensive performance optimization solution on this list. It handles everything: caching, image optimization, code minification, font optimization, lazy loading, and CDN delivery. The image optimization is sophisticated with automatic compression, WebP/AVIF conversion, intelligent lazy loading, and CDN serving that adapts based on each visitor's device.
What makes NitroPack special is how it optimizes your entire site holistically. It analyzes your pages, generates critical CSS for above-the-fold content, defers non-critical resources, and optimizes resource loading order. The plugin is particularly good at handling Core Web Vitals, specifically targeting metrics that Google uses to evaluate user experience.
The free plan includes basic optimization for smaller sites. Paid plans start at $21 monthly for the mini plan and scale up based on traffic volume. I recommend NitroPack for established sites where performance directly impacts revenue, like online stores and SaaS websites where every second of load time matters.
16. ReSmush.it
reSmush.It is a simple yet effective plugin that focuses on providing solid optimization performance at no cost. It allows you to optimize images up to 5MB and uses an external API for processing. The plugin automatically compresses images upon upload, saving you from manual adjustments.
It’s especially well-suited for small blogs or personal websites that want reliable compression without paying for premium tools. The interface is lightweight, fast, and easy to understand, even for non-technical users. Bulk optimization is supported, so existing media libraries can be optimized quickly.
However, it lacks support for modern image formats like WebP and does not offer CDN integration. Despite that, reSmush.It is one of the best completely free solutions for WordPress image compression.
17. Kraken.io

Kraken.io Image Optimizer WordPress Plugin
Kraken.io provides a powerful API and WordPress integration for serious developers and performance enthusiasts. It supports both lossy and lossless compression, ensuring flexibility depending on the project. Bulk optimization and secure HTTPS connections make it ideal for enterprise environments.
The plugin’s dashboard is functional, allowing quick uploads and real-time progress tracking. It supports WebP and Retina images, ensuring optimized visuals across all devices. Kraken’s API makes it a strong choice for developers who want full integration into custom systems.
The main limitation is that the interface feels dated compared to newer tools, and pricing may not appeal to smaller websites. However, its reliability and precision make it a trusted solution for advanced users.
18. Robin Image Optimizer
Robin Image Optimizer 2020 - How To Use Robin Image Optimizer Plugin For WordPress - Compress Images
Robin Image Optimizer is a practical freemium plugin that provides cloud-based image compression. It offers multiple optimization levels, giving users control over how aggressive the compression should be. The system is fully automated and runs quietly in the background once configured.
It supports WebP conversion and integrates lazy loading for additional speed benefits. The plugin also allows scheduled optimization tasks, ensuring your media library remains lightweight over time. This makes it particularly useful for users who upload images regularly.
Under heavy load, the cloud servers can slow down temporarily. Even so, Robin Image Optimizer remains a convenient, budget-friendly choice for most website owners.
19. ImageRecycle
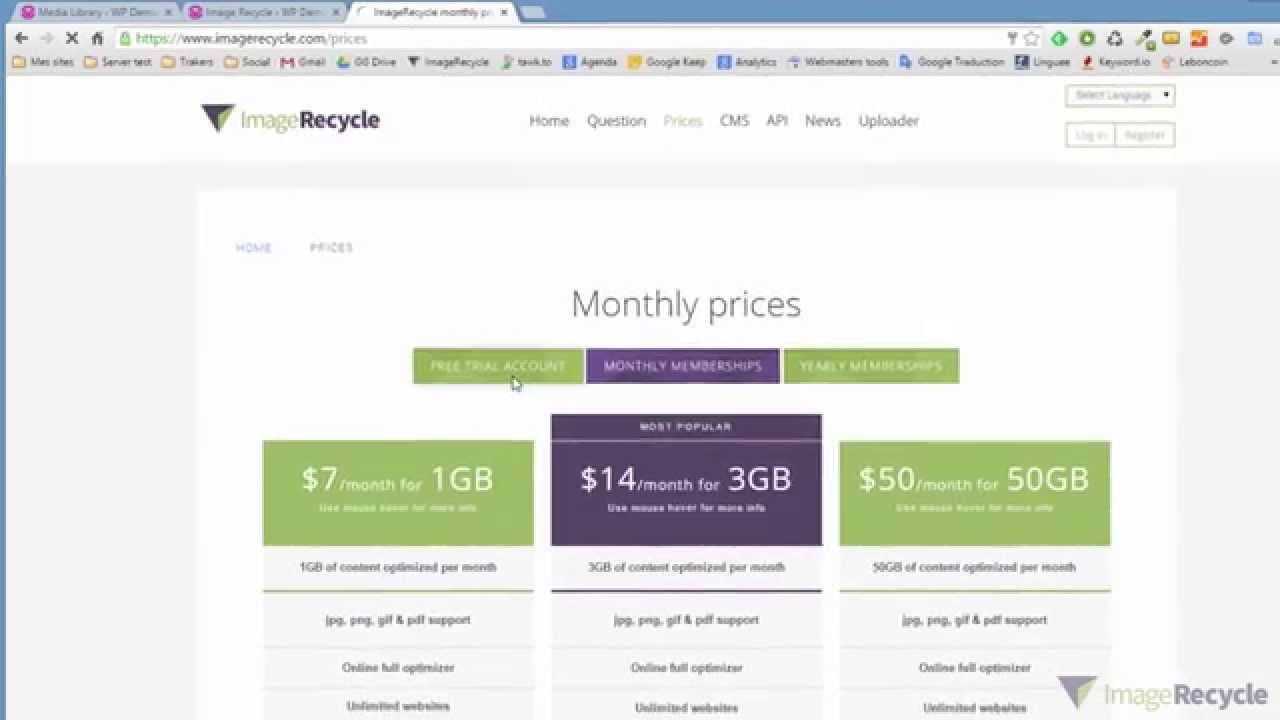
WordPress image optimization
ImageRecycle specializes in compressing both images and PDFs, which is useful for sites that host documents alongside visuals. It integrates easily with WordPress, Joomla, and Shopify, offering cross-platform compatibility. The optimization process is fast, and the plugin provides detailed performance reports.
Automatic resizing and backup options give users flexibility, while the developer API allows custom automation. ImageRecycle’s approach is privacy-friendly, keeping user data secure. It also includes a 15-day free trial to evaluate its effectiveness before purchase.
The plugin’s interface is somewhat dated but functional. Overall, it’s a reliable and lightweight solution for those who prioritize simplicity and privacy.
20. Sirv
Sirv Wordpress Plugin | Best Free Image CDN for Wordpress Website
Sirv offers advanced, real-time image delivery and optimization through its AWS-powered CDN. It resizes and compresses images on demand, adapting dynamically to each visitor’s device and connection speed. The result is consistently fast, high-quality image rendering.
It supports modern formats like WebP and AVIF and can handle specialized use cases such as 360° product images or zoomable galleries. The lazy loading feature ensures that offscreen images don’t delay page rendering. These capabilities make Sirv one of the most technically advanced tools on this list.
Because of its complexity, it’s better suited to developers and agencies rather than beginners. Once configured, though, Sirv can transform the performance of visually rich websites.
See Also: Best WordPress SEO Plugins
How To Test And Compare Image Optimization Plugins
Once you install a plugin, you must rigorously test its real-world impact on your site's performance before fully committing. Not all compression is equal, and aggressive settings can damage visual quality. Here’s a detailed, step-by-step process I use with clients to ensure they choose the right tool:
- Measure baseline speed using PageSpeed Insights or GTmetrix. Before you change anything, record your site’s current scores, focusing specifically on initial load time and the Largest Contentful Paint (LCP) metric, which is heavily influenced by the size of your main images.
- Optimize a few images using the plugin's default settings. Apply the plugin to a small, representative sample of images (e.g., one large banner, one thumbnail, one transparent PNG). This controls the experiment and allows you to isolate the plugin's effect.
- Compare file sizes and load times before and after. Use the plugin's logs or your hosting file system to check the percentage reduction in file size. Re-measure the loading speed of your test page to confirm a measurable improvement.
- Adjust the quality level until you find the ideal visual and performance balance. If the default settings are too aggressive (resulting in noticeable artifacts or blurring), increase the quality level (e.g., from 80% to 85% or 90%). If the visual quality is fine but the reduction is minimal, try lowering the quality. The sweet spot is the highest file size reduction that is visually indistinguishable from the original.
- Re-test Core Web Vitals, especially LCP and CLS. After optimizing your site's main content, check Google’s Core Web Vitals report again. Optimizing the largest visible image should directly improve LCP. Also, watch out for Cumulative Layout Shift (CLS), which can increase if the plugin improperly injects dimensions or delays image loading too aggressively.
- Check for conflicts with caching or lazy load plugins. Image optimization tools can sometimes clash with third-party caching solutions or separate lazy loading plugins. Ensure that disabling or enabling the new optimizer doesn't negatively impact the functionality of your existing performance stack.
- Keep notes. Every site has unique media needs, and what works for a high-traffic blog might not fit a content-heavy WooCommerce store. Document the exact settings, the file size reduction achieved, and the overall change in your page speed scores.
Read Also: Best WordPress Plugins For User Testing
Best Practices To Combine With Plugins
Even the best plugin can’t fix poor image hygiene. To achieve world-class speed, you must combine your optimization tool with smart image preparation habits:
- Resize before upload: This is arguably the most crucial step. Never upload 4000px images for a 600px slot. Use image editing software to ensure the dimensions of the file you upload match the maximum display size needed on your site. This reduces the file size before compression even begins.
- Use correct formats: Choose the right file type for the job. Use JPG for complex photographs, PNG for images requiring transparency or sharp lines, SVG for scalable icons and logos, and leverage modern formats like WebP or AVIF when possible, as they offer superior compression at high quality.
- Leverage lazy loading: Ensure your site delays loading images that are off-screen until a visitor scrolls near them. This dramatically speeds up the initial render time of your page, improving the user experience and LCP. Most good optimization plugins include this feature.
- Use a CDN (Content Delivery Network): A CDN serves your images from a network of global servers located closest to your visitors geographically. This reduces latency and speeds up image delivery for everyone, everywhere.
- Audit periodically: Schedule time every few months to review your media library. Remove unused images, delete duplicate files, and compress any older images that may have been uploaded before you installed your optimizer.
- Monitor performance: Load times are dynamic. Recheck your site speed after major events like uploading a large gallery, changing themes or design elements, or installing any new performance plugin.
In addition to technical optimization, it’s important to stay informed about wider trends in digital performance and independent publishing. Resources such as Connecticut Independentregularly feature insightful discussions on web development, content strategy, and online business growth. Keeping up with expert-backed insights like these can help you make smarter decisions when improving your website’s speed, accessibility, and long-term performance.
Compatibility And Migration Tips
Switching image optimization plugins or changing settings can inadvertently break images, cause display issues, or lead to broken file paths if handled poorly. Always follow these steps to manage changes safely:
- Backup originals before migrating or re-optimizing. This is non-negotiable. Before initiating any bulk re-compression or switching plugins, use a dedicated backup solution or the optimization plugin's built-in feature to save the original, uncompressed files. This allows for a quick rollback if something goes wrong.
- Disable one optimizer before activating another to prevent conflicts. Running two optimization tools simultaneously almost always leads to unpredictable errors, including double-compression (which damages quality) or fatal conflicts with file paths and metadata.
- Check thumbnail regeneration if switching sizes or formats. If your new plugin changes the primary image format (e.g., from JPG to WebP) or if you switch themes, use a thumbnail regeneration tool to ensure all existing posts and pages properly use the newly optimized sizes and formats.
- Test pages visually after migration to look for broken URLs or missing WebP files. Check your homepage, a post with many images, and a product page (if applicable) across different browsers (Chrome, Firefox, Safari). Look for any grey boxes, 404 errors, or instances where the images look low-resolution or fail to display the correct WebP version.
- Purge cache or CDN after big image changes to ensure new files are served. Once you've confirmed the optimization is complete, clear your website cache, browser cache, and most importantly, purge your CDN cache. If you skip this step, the CDN will continue to serve the old, larger images for hours or days.
Frequently Asked Questions
Do Image Optimization Plugins Reduce Image Quality?
Quality reduction depends entirely on your compression settings. Lossless compression maintains 100% quality but offers modest file size savings. Lossy compression removes some data to achieve larger savings, but modern algorithms are sophisticated enough that visual differences are minimal at moderate compression levels. Most plugins let you choose your compression level, so you control the quality-size tradeoff. I recommend testing compression on sample images before bulk optimizing to ensure you're happy with the results.
Can I Optimize Images That Are Already Uploaded To My Site?
Yes, this is called bulk optimization. Most image optimization plugins include a bulk optimizer that scans your existing media library and processes all images in one operation. This can take time for large libraries with thousands of images, but it's essential when adding optimization to an established site. The plugins handle this by processing in batches and working in the background so your site remains functional during optimization.
Will Optimizing Images Improve My Google Rankings?
Image optimization improves page speed, which is a confirmed Google ranking factor, especially after the Core Web Vitals update. Faster loading pages rank better in search results, all else being equal. Additionally, optimized images improve user experience by reducing bounce rates and increasing engagement, which indirectly benefits rankings. While optimization alone won't catapult you to position one, it's a crucial component of technical SEO that supports better rankings.
What's The Difference Between WebP And AVIF Formats?
WebP is a modern image format developed by Google that provides 25-35% better compression than JPEG at equivalent quality. It's supported by over 95% of browsers. AVIF is even newer, offering approximately 50% better compression than WebP with superior color accuracy and detail preservation. However, AVIF support is around 90% of browsers. The best approach is to use plugins that create both formats and serve them intelligently based on browser support, with fallback to JPEG or PNG for older browsers.
Do I Need To Manually Optimize Every Image I Upload?
No, once you enable automatic optimization in your chosen plugin, every new image you upload gets optimized automatically without any action on your part. The plugin processes images in the background as they're added to your media library. You only need to manually trigger bulk optimization for images that existed before you installed the plugin.
Conclusion
After years of testing, my rule of thumb is simple. For simplicity, choose Smush or Imagify. For advanced control, go with ShortPixel or EWWW. For dynamic delivery and CDN-based speed, Optimole or WP Compress stand out.
Image optimization is an ongoing process that evolves as new formats and technologies emerge. The right plugin automates most of the heavy lifting, freeing you to focus on creating engaging, high-quality visuals. A fast site with beautifully optimized images not only looks professional but also converts better and ranks higher.
If you found this helpful, share it with fellow WordPress users or your web development team; it might save them hours of experimentation.